
1. Introduction: Why Proper Curtain Track Glider Installation Matters
For B2B buyers—such as interior contractors, hotel renovation companies, commercial construction suppliers, and wholesale distributors—curtain track gliders play a critical role in ensuring smooth, durable, and low-maintenance curtain operation.
Incorrect installation leads to:
- Increased friction and noise
- Premature wear
- Track deformation
- Frequent customer complaints
- Higher long-term maintenance costs
This guide provides professional-level installation procedures, technical parameters, and procurement recommendations to help B2B users select, install, and maintain curtain track gliders effectively.
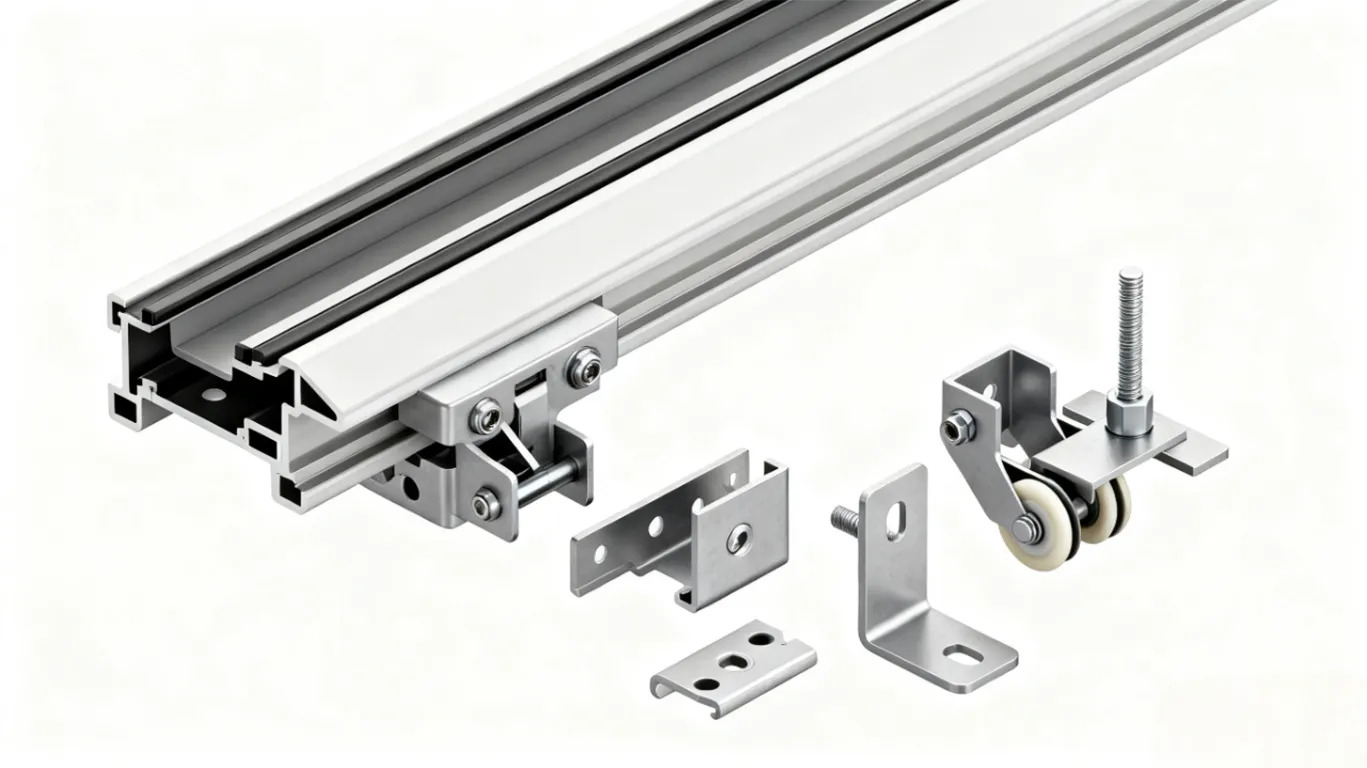
2. Understanding Curtain Track Gliders: Types, Materials & Technical Parameters
2.1 Common Glider Materials
- POM (Polyoxymethylene)
- High hardness, low friction
- Common in commercial hotels, offices
- Load-bearing: 3–6 kg per set (depending on track type)
- Nylon (PA66)
- Good balance between strength & cost
- Used in residential and light commercial applications
- Load-bearing: 2–4 kg
- Metal Ball-Bearing Gliders (Aluminum or Stainless Steel Core)
- Smoothest motion
- Ideal for heavy blackout curtains or acoustic curtains
- Load-bearing: 8–12 kg+
2.2 Track Compatibility
Gliders must match the track profile. Common standards include:
- U-shaped track (6mm, 8mm runners)
- I-shaped track (standard hotel track)
- Ceiling-mounted slimline track
- Heavy-duty industrial track (12–14mm metal runners)
2.3 Key B2B Technical Specs
For B2B procurement, look for:
- Coefficient of friction <0.35
- Operating life > 15,000 cycles
- Temperature resistance −20°C to 80°C
- Noise rating < 35 dB under load
- Material compliance: REACH, RoHS
Commercial clients—especially hospitality and office contractors—prefer gliders that meet these durability and environmental standards.
3. Tools & Materials Needed for Installation
Tools
- Measuring tape
- Electric drill (6mm–8mm bit)
- Level ruler
- Screwdriver or impact driver
- Plastic anchors / wall plugs
- Safety gloves
Materials
- Curtain track
- Appropriate track gliders (POM/ball-bearing/etc.)
- End caps
- Ceiling or wall brackets
- Screws + fittings
4. Step-by-Step Guide: How to Install Curtain Track Gliders
4.1 Step 1: Measure and Mark the Mounting Positions
Measure the installation area and note:
- Track length
- Bracket spacing (recommended 40–50 cm for commercial use)
- Ceiling height & curtain drop
B2B project standard:
For heavy-duty curtains, bracket spacing should be reduced to 30–35 cm to avoid track bending.
Use a laser level to ensure perfect alignment—especially for hotel or showroom installations where visual precision is required.
4.2 Step 2: Install the Curtain Track
- Pre-drill holes at marked points.
- Insert wall plugs or anchors.
- Position the track with brackets.
- Secure with screws.
For ceiling-mounted commercial tracks, ensure the screws penetrate at least 35–40 mm into solid structure for load safety.
4.3 Step 3: Insert the Track Gliders
Insert the gliders into the open end of the track:
- For U-track: slide directly
- For I-track: snap-fit gliders
- For ball-bearing gliders: align wheel axis properly
B2B recommendation:
Install 10–14 gliders per meter depending on curtain weight.
Load reference:
- Sheer curtains: 10/m
- Dim-out curtains: 12/m
- Blackout or acoustic curtains: 14–16/m
4.4 Step 4: Install End Caps
Close the track ends using:
- Standard end caps for residential
- Locking end caps for commercial installations (prevents gliders falling off)
Locking end caps are essential for:
- Hotels
- Hospitals
- High-traffic spaces
4.5 Step 5: Hang Curtains
Attach curtain hooks to the gliders and test the sliding motion.
Checklist:
- Smooth operation
- No friction noise
- No resistance during opening/closing
If resistance occurs:
- Check glider alignment
- Ensure no debris inside the track
- Add silicone-based lubricant if required (avoid oil-based lubricants which attract dust)
5. Troubleshooting: Common Installation Issues
| Issue | Cause | Solution |
|---|---|---|
| Gliders stuck | Track not level | Re-align track using level tool |
| Noise during sliding | Low-quality gliders | Replace with POM or ball-bearing gliders |
| Gliders fall out | Wrong end cap | Use locking end caps |
| Curtain sags | Too few gliders | Add additional gliders per meter |
6. B2B Procurement Guide for Curtain Track Gliders
B2B buyers should look for:
- Track & glider compatibility certification
- Material technical sheets
- Load-bearing test reports
- REACH/RoHS compliance
- Supply capacity & MOQ flexibility
- OEM/ODM service
7. Conclusion
Correct installation of curtain track gliders is essential for ensuring long-term durability, smooth curtain movement, and reduced maintenance—especially in commercial environments such as hotels, offices, showrooms, and residential projects managed by contractors or wholesalers.
By selecting the right materials, understanding technical specifications, and following proper installation steps, B2B buyers can optimize performance and reduce lifecycle costs. For bulk orders, OEM projects, or commercial-grade track systems, partnering with a reliable supplier ensures product quality, installation efficiency, and long-term operational stability.